Freezedを活用して美しいモデルを定義する【Flutter】

目次
Freezedパッケージの紹介
Dartでモデルを0から作成しようとすると、以下の作業が発生します。
- フィールド定義
- マッピングロジック定義
- データ検証ロジック定義
Freezedを使うと、豊富なアノテーションや自動生成コードによって、簡潔で綺麗なモデル定義が可能になります。
インストール
以下のコマンドを実行して、必要なパッケージをインストールします。
flutter pub add freezed_annotation
flutter pub add dev:build_runner
flutter pub add dev:freezed
flutter pub add json_annotation
flutter pub add dev:json_serializable
モデル定義
今回は、下記のようなブログ情報のJSONデータを例にモデル定義していきます。
{
  "title": "Freezedを活用して美しいモデルを定義する【Flutter】",
  "thumbnail": "https://techinit.co.jp/wp-content/uploads/2024/06/flutter-freezed-1.png",
  "body": "ここにテキスト ここにテキスト...",
  "published_at": "2024/01/01 19:24",
  "updated_at": "2024/07/01 20:48"
}
Freezedを使用したモデル定義は以下になります。
lib/models/post/post.dart
import 'package:freezed_annotation/freezed_annotation.dart';

part 'post.freezed.dart';
part 'post.g.dart';

@freezed
class Post with _$Post {
  const factory Post({
    required String title,
    required String thumbnail,
    required String body,
    required String published_at,
    required String updated_at,
  }) = _Post;

  factory Post.fromJson(Map<String, Object?> json) => _$PostFromJson(json);
}
モデルを定義するとエラーが出ますが、Freezedのコード自動生成を実行すれば消えます。
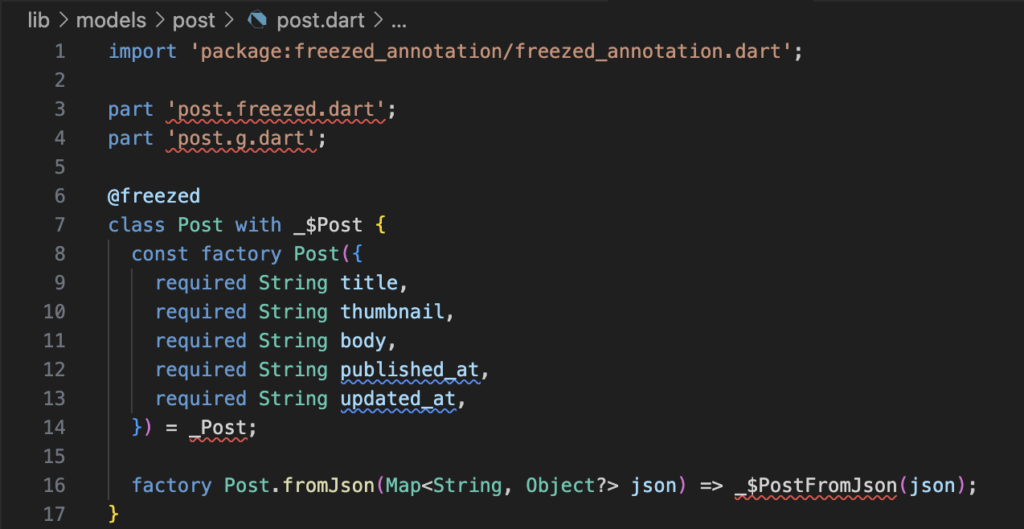
コード自動生成
以下のコマンドを実行して、必要なコードを自動生成します。
dart run build_runner build実行すると、以下のファイルが作成されます。
- post.freezed.dart
- post.g.dart
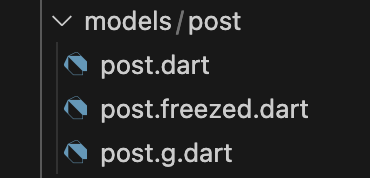
生成されたファイルを見てみると、マッピングロジックなどが定義されているのがわかります。
モックAPIを作成
JSONデータを返す簡易的なモックAPIを定義します。
lib/server.dart
import 'dart:convert';

final post = {
  'title': 'Freezedを活用して美しいモデルを定義する【Flutter】',
  'thumbnail':
      'https://techinit.co.jp/wp-content/uploads/2024/06/flutter-freezed-1.png',
  'body': List.generate(80, (_) => 'ここにテキスト ').join(),
  'published_at': '2024/01/01 19:24',
  'updated_at': '2024/07/01 20:48',
};

Future<String> postRes() async {
  await Future.delayed(const Duration(seconds: 2));
  return jsonEncode(post);
}
APIデータをマッピング
JSONデータをオブジェクトに変換します。
jsonDecodeした後に、モデルに定義されているfromJsonメソッドを呼ぶだけで変換できます。
import 'dart:convert';

import 'package:flutter_freezed_example/models/post/post.dart';
import 'package:flutter_freezed_example/server.dart';

Future<Post> getPost() async {
  final res = await postRes();
  final json = jsonDecode(res);
  return Post.fromJson(json);
}
データを画面表示
以下のようなWidgetを作成します。
import 'package:flutter/material.dart';
import 'package:flutter_freezed_example/api.dart';
import 'package:flutter_freezed_example/models/post/post.dart';

void main() {
  runApp(const MyApp());
}

class MyApp extends StatelessWidget {
  const MyApp({super.key});

  @override
  Widget build(BuildContext context) {
    return MaterialApp(
      title: 'Flutter Demo',
      theme: ThemeData(
        colorScheme: ColorScheme.fromSeed(seedColor: Colors.deepPurple),
        useMaterial3: true,
      ),
      home: const MyHomePage(),
    );
  }
}

class MyHomePage extends StatefulWidget {
  const MyHomePage({super.key});

  @override
  State<MyHomePage> createState() => _MyHomePageState();
}

class _MyHomePageState extends State<MyHomePage> {
  late Future<Post> futurePost;

  @override
  void initState() {
    super.initState();
    futurePost = getPost();
  }

  @override
  Widget build(BuildContext context) {
    return Scaffold(
        appBar: AppBar(
          title: const Text('記事'),
        ),
        body: FutureBuilder(
          future: futurePost,
          builder: (context, snapshot) {
            if (snapshot.hasError) {
              return Text('${snapshot.error}');
            }
            if (!snapshot.hasData) {
              return const Center(child: CircularProgressIndicator());
            }

            return _PostView(post: snapshot.data!);
          },
        ));
  }
}

class _PostView extends StatelessWidget {
  final Post post;
  const _PostView({required this.post});

  @override
  Widget build(BuildContext context) {
    return Container(
        padding: const EdgeInsets.all(8),
        child: ListView(
          children: [
            Text(
              post.title,
              style: const TextStyle(fontSize: 20, fontWeight: FontWeight.w600),
            ),
            Image.network(post.thumbnail),
            Wrap(
              spacing: 8,
              children: [
                Text('公開日:${post.published_at}'),
                Text('更新日:${post.updated_at}'),
              ],
            ),
            Container(
                padding: const EdgeInsets.only(top: 16), child: Text(post.body)),
          ],
        ));
  }
}
以下のような画面が表示されるはずです。
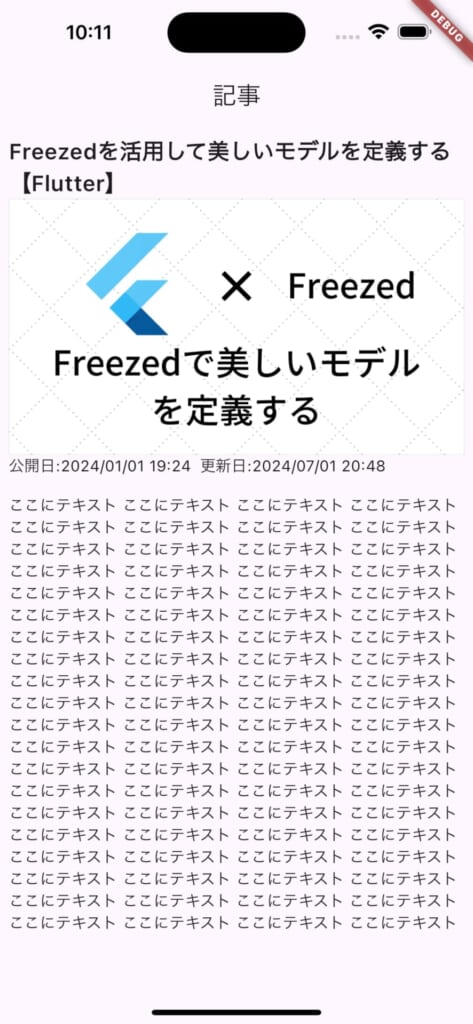
様々なユースケース
・List型のデータ変換
List型の場合は、以下のように変換できます。
Future<List<Post>> getPosts() async {
  final res = await postsRes();
  final json = jsonDecode(res) as List<dynamic>;
  return json.map((post) => Post.fromJson(post)).toList();
}
Widget定義
class _PostListView extends StatelessWidget {
  final List<Post> posts;
  const _PostListView({required this.posts});

  @override
  Widget build(BuildContext context) {
    return Container(
        padding: const EdgeInsets.all(8),
        child: ListView(
            children: posts.map((post) {
          return ListTile(
              leading: Image.network(post.thumbnail),
              title: Text(post.title),
              subtitle: Text(post.published_at));
        }).toList()));
  }
}
画面表示
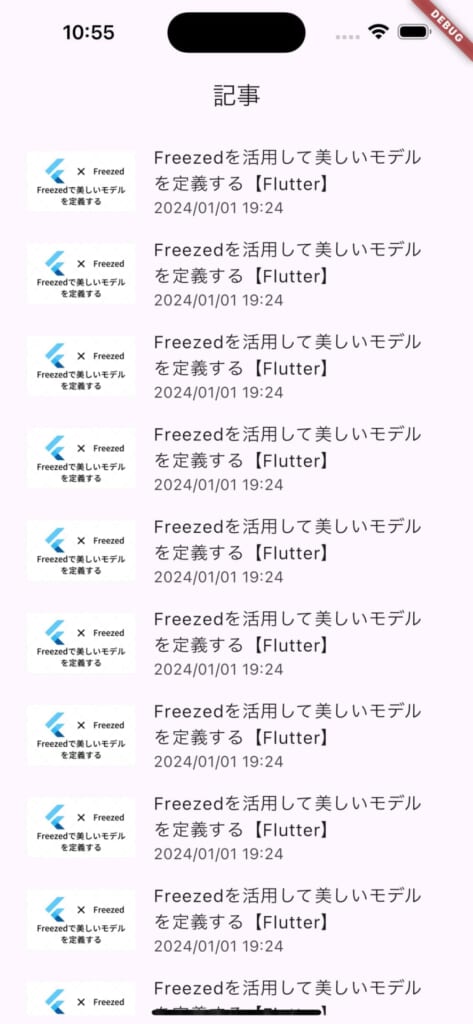
・階層構造のデータ変換
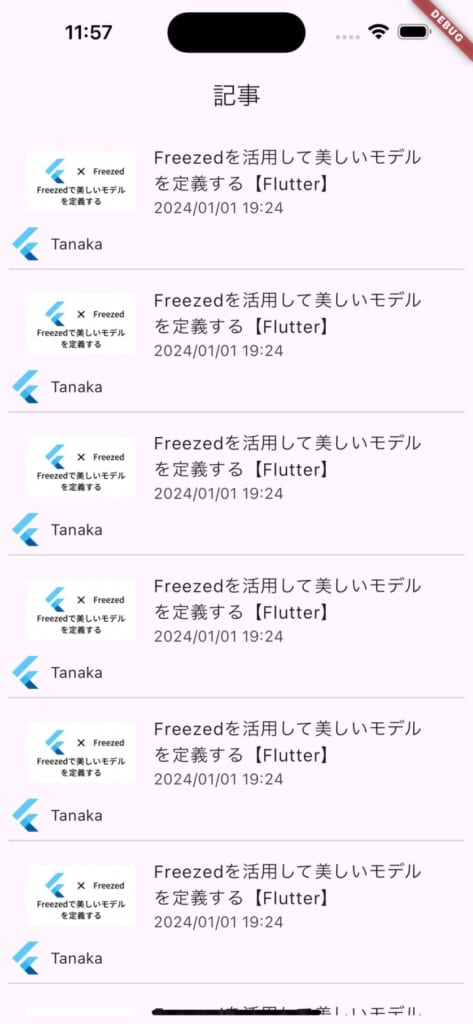
階層構造のJSONも変換できます。投稿の執筆者情報を表示する例を見てみます。
{
  "title": "Freezedを活用して美しいモデルを定義する【Flutter】",
  "thumbnail": "https://techinit.co.jp/wp-content/uploads/2024/06/flutter-freezed-1.png",
  "body": "ここにテキスト ここにテキスト...",
  "author": {
    "name": "Tanaka",
    "icon": "https://techinit.co.jp/wp-content/uploads/2024/06/icon_flutter.png"
  },
  "published_at": "2024/01/01 19:24",
  "updated_at": "2024/07/01 20:48"
}
まずは、ユーザのモデルを定義します。
lib/models/user/user.dart
import 'package:freezed_annotation/freezed_annotation.dart';

part 'user.freezed.dart';
part 'user.g.dart';

@freezed
class User with _$User {
  const factory User({
    required String name,
    required String icon,
  }) = _User;

  factory User.fromJson(Map<String, Object?> json) => _$UserFromJson(json);
}Postクラスにauthorを追加します。
lib/models/post/post.dart
@freezed
class Post with _$Post {
  const factory Post({
    // 省略
    required User author, //追加
  }) = _Post;

  factory Post.fromJson(Map<String, Object?> json) => _$PostFromJson(json);
}
コード自動生成
dart run build_runner buildWidget定義
class _PostListView extends StatelessWidget {
  final List<Post> posts;
  const _PostListView({required this.posts});

  @override
  Widget build(BuildContext context) {
    return Container(
        padding: const EdgeInsets.all(8),
        child: ListView(
            children: posts.map((post) {
          return Column(
            crossAxisAlignment: CrossAxisAlignment.start,
            children: [
              ListTile(
                  leading: Image.network(post.thumbnail),
                  title: Text(post.title),
                  subtitle: Text(post.published_at)),
              Wrap(spacing: 8, crossAxisAlignment: WrapCrossAlignment.center, children: [
                Image.network(
                  post.author.icon,
                  width: 30,
                  height: 30,
                ),
                Text(post.author.name)
              ]),
              const Divider(),
            ],
          );
        }).toList()));
  }
}
画面表示
・プロパティ名の変更
手元で動かしている方はお気づきかもしれませんが、Dartクラスのフィールドをスネークケースで定義すると、警告が出ます。

snake_caseのJSONプロパティをlowerCamelCaseのフィールドに変換します。
@JsonKey アノテーションを使います。
@freezed
class Post with _$Post {
  const factory Post({
    required String title,
    required String thumbnail,
    required String body,
    @JsonKey(name: 'published_at') required String publishedAt,
    @JsonKey(name: 'updated_at') required String updatedAt,
    required User author,
  }) = _Post;

  factory Post.fromJson(Map<String, Object?> json) => _$PostFromJson(json);
}
このようにすることで変換できます。
ただし、JsonKeyアノテーションを使うと下記のような警告が出ます。
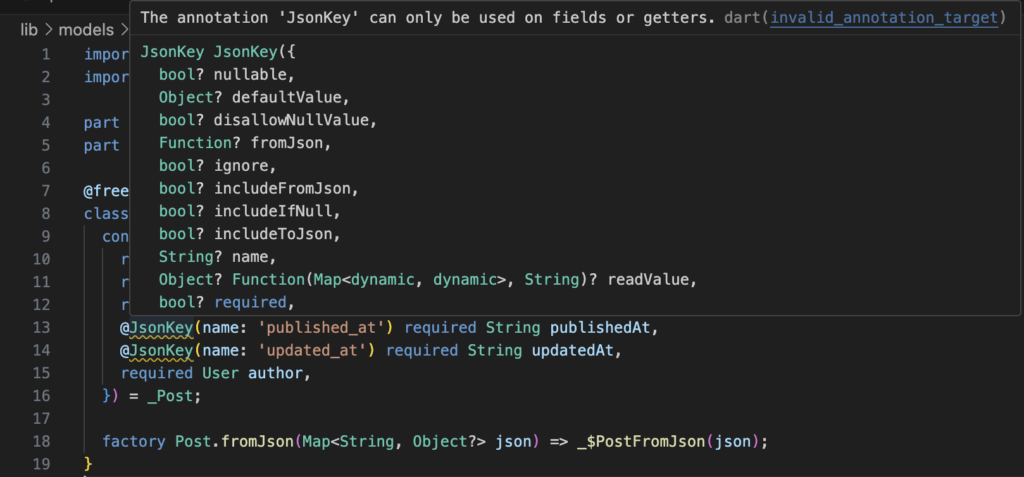
GitHubのissue をみる限り、現状ignoreするしかないようなので、ファイルの先頭に以下のコメントを追加します。
// ignore_for_file: invalid_annotation_target記法の変更以外にも、プロパティ名を変えてマッピングしたい時に役立ちます。
まとめ
以上となります。
次回は、ジェネリック型を活用したさらに高度なモデル定義を紹介します。











この記事へのコメントはありません。